Business cards play an important role in branding and marketing for any business. A typical business card contains key details of the company, such as email address, phone number, website address, and others. Even though it might seem a bit irrelevant, marketers have turned these cards into an effective tool that can drive in new customers. Using a Cricut machine, you can create personalized business cards for your own brand or design them for other entrepreneurs and marketing professionals. Let’s explore how to make business cards with Cricut.
Step 1: Designing Your Business Card
The first stage is to design the business card. Designing a business card is very easy. You can also find premade designs from the Design Space Library, edit them, and customize them according to your needs. The basic steps involved in this are:
- First, design your business card. Open the Cricut Design Space on your system.
- Next, select the Shapes option. The icon is present on the left panel.
- Later, you need to drop a square on the canvas.

- Afterward, go to the top menu, and unlock the Proportions to resize the card.
- Here, it is important to note that the standard size of a business card is 3.5 inches by 2 inches.
- Once you have resized the card, you can change the color of the card.
- Go to the Color Box on the top menu to change the card’s color.
- Next, it is important to add details, such as the number, name of the business, email address, and company logo. You can even add any other information if they are necessary.

- Finally, after you finalize the card, you need to lay all the card elements in a single layer. To do that, select all the layers and click on the Flatten option.
Step 2: Printing the Business Cards
Once you complete designing the card on Design Space, it is time to print the cards from a printer. Printing the cards from a printer first is important, as the Cricut machine can only be used later to cut.
- The first step in printing the card is selecting the Make It option on the Design Space. It is always present in the upper-right corner of the program.
- Now, you can add extra copies. Adding copies of a card here is a good option because changing the number of copies is easy, depending on your needs.
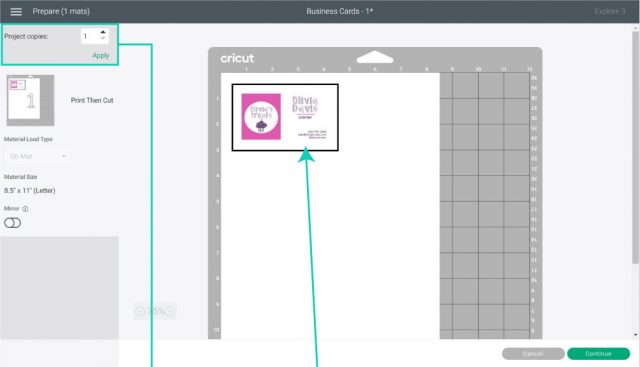
- Select the Project Copies and then click on Apply for the number of cards. Now, the layout has changed.

- Next, select Continue and select the print materials.
- After leaving the Mat Preview section, the Design Space will provide proper instructions to cut the project.
- The first thing you must do here is select the Print option.
- Now, you will see an option saying Send to Printer. Select it to go ahead.

- Next, a Print Setup window will open; you can select your printer from this window. Also, you add extra copies, then turn on bleed or use the system dialog box.
- Here, the System Dialog box is a useful feature for finding your printer or changing the type of paper you use. It is also helpful for saving the project as pdf, for later use.
- Finally, it is time to choose the material for the project. However, you can set the material by moving the smart dial on the Cricut machine. You can move it to custom and select material from Cricut Design Space.
Step 3: Preparing the Mat for Cutting
The final step in how to make business cards with Cricut is cutting the printout. This step will cut the paper into individual business cards.
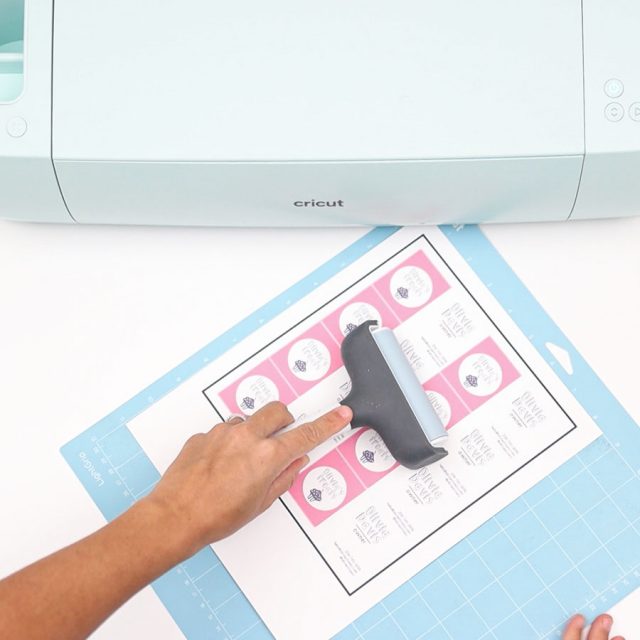
- First, take the printout copy and place it on the mat.
- Using a Brayer tool, you can stick the paper to the mat.
- Next, insert the Fine-Point Blade in the Clamp B of the machine.
- Later, you need to load the Cricut machine by keeping the mat in position to the machine.
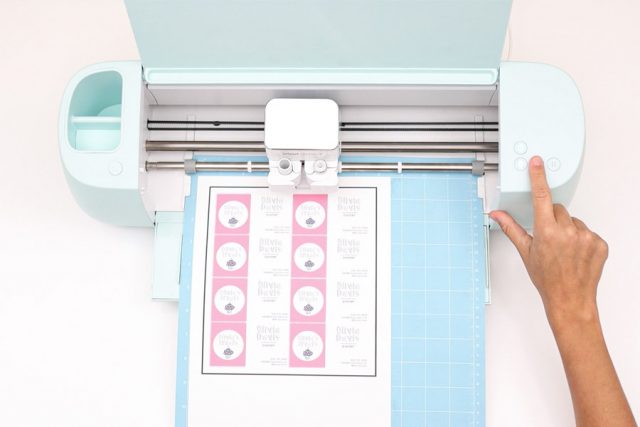
- Afterward, the Cricut machine will read the frame of the project, and then it will start cutting the business cards.
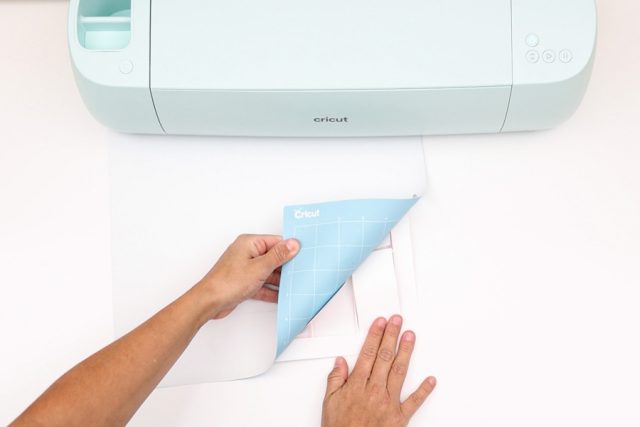
- Once the machine cuts the business card, you can remove the mat and separate the individual cards.
Conclusion
So, you have finally understood how easy it is to make any projects from a Cricut machine. With a device like Cricut, you can design and print your business cards or take it on commission for others. It can also be your strategy that can get you more clients. In this blog, you will get a detailed tutorial on how to make business cards with Cricut.
FAQs
Can I make Business Cards with Cricut Joy?
Yes, you can make Business Cards with any Cricut machine. It is because of the limited steps involved in doing this project which requires the machine to cut the material. If you are a beginner or have recently started using a Cricut machine, then Joy will be the best for creating your crafting business.
Can I print my Business logo with a Cricut machine?
Yes, you can print any logo with a Cricut machine. The Cricut machine has many features that enable users to cut any design they wish. Also, the Print Then Cut function of the Cricut makes it even easier to cut your business logo. All you have to do is print the logo on paper, then load it onto the machine. Now, Cricut will cut the logo with high precision.
Why is it important to have Business Card?
Business cards are a personal marketing tool containing the main contact details regarding the person and business. Also, it will contain the address, contact information, and a little bit about the business, such as the company’s logo or tagline. Business cards also enhance the professional image of a business person and leave a lasting impression.